Removing a partial facial color cast in Adobe Photoshop
This little tutorial shows steps to remove color casts that come from colored surfaces reflecting on part of a face.
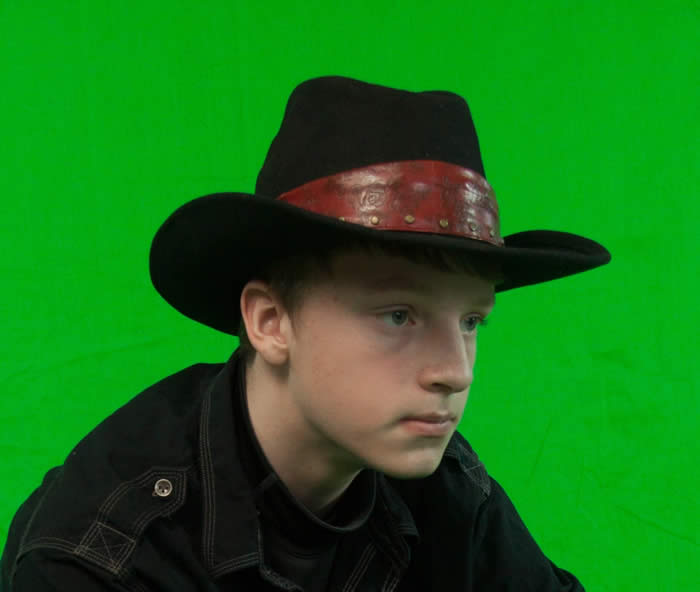
The example here is a shot in front of a green screen, where some of the green light reflected on one side of the model's face:
First, let’s get rid of the green color in the background so the color of the subject is easier to see. Of course, if this was a natural scene and you wanted to keep the background, you would skip this step.
Select the green background using the magic wand tool.
Create a new hue/saturation adjustment layer (note that it is automatically masked to affect only the green background); set the saturation control of this adjustment layer to zero.This turns all the green to shades of gray.

The first helpful step before correction is to select the subject. You don’t have to do this, but it helps to confine the brush action.
Use whatever method works with your image (magic wand, lasso). For this image, it is easy; just select the background (which we already did) and then invert the selection: Select: Reselect. Select: Inverse. Now the subject is selected.
Now for the actual correction:
Create a new layer. Set the blend mode of this layer to “Color.” Your layer palette should look like this:
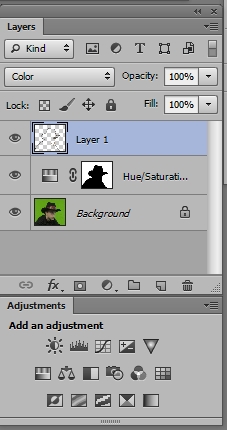
The blue color of layer 1 shows that it is selected. It's hard to see, but layer 1 shows the subject-selection outline. This means that any painting on this layer will be confined to the subject.
Now:
Use the color picker to pick the color of a particular area of the good side of the face corresponding to an incorrect part of the bad side. For example, use the color picker eyedropper tool to select the color of the upper lip.
Select the brush tool, and set for a soft edge and an appropriate size.
Make sure the new layer is still selected in the layer palette. Now paint the selected color over the incorrect area (the greenish upper lip) using the brush.
Do not try to paint large areas the same color – it will look like a watercolor wash. Instead, select color from a corresponding good part of the face and paint a small corresponding bad area.
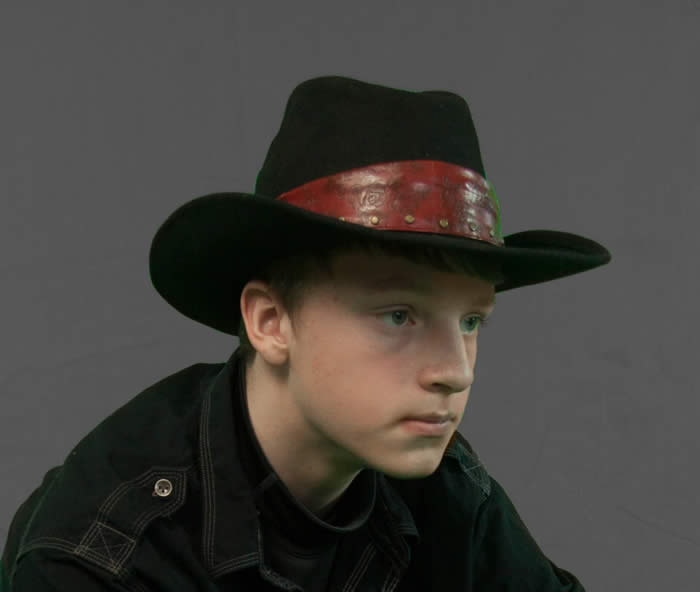
Here's a partial result - the hat band, edges of the hat and shirt, a spot on the face, and the whites of the eyes are not corrected yet.
If the result isn’t right, you can select a different better color for the brush, either by using the eyedropper or by manually adjusting the color. Then just paint over the bad area.
Using a very small brush, select a gray color, and paint the whites of the eyes.
Look for any missed spots - especially check the edges of the subject.
And here's the final result:
 :
: